Mastering Watercolor Fur: The Ultimate Step-by-Step Guide
Capturing the soft, flowing texture of fur with watercolors is a rewarding challenge that transforms a simple wash into a study in texture and depth. Unlike painting a smooth surface, rendering hair requires a shift in perspective, focusing on the direction, length, and light interaction of each cluster rather than individual strands. The key to success lies in understanding that you are not drawing hair line by line, but building the illusion of volume through careful control of value, edge, and strategic layering.
Understanding the Anatomy of Fur
Before picking up a brush, it is essential to observe the biological structure you are trying to mimic. Fur is not a flat covering; it grows in distinct patterns and clusters, often following the form of the animal's body. Each strand converges at a central follicle, creating a subtle tuft or grain. When translating this to paper, think in terms of these directional groupings. Painting against the grain will result in a chaotic, unnatural look, while respecting the flow will instantly give your subject a sense of life and movement. Analyze reference photos to see how the light catches these clumps, creating bright highlights and deep, shadowed recesses.
Mastering the Dry Brush Technique
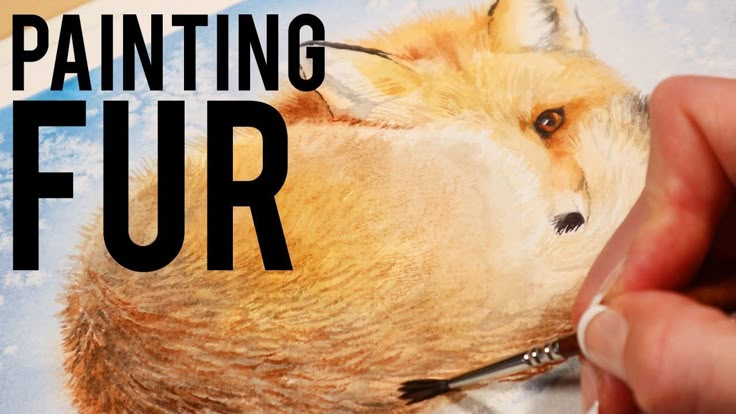
The dry brush method is arguably the most effective way to simulate the sharp, defined edges of shorter fur. This technique involves using a relatively dry brush with minimal water and a higher pigment load to drag color across the surface of the paper. Instead of loading the brush and applying it broadly, you want to graze the tip of the bristles lightly over the washes below. This skips across the texture of the paper, leaving broken, scratchy strokes that mimic the appearance of individual hairs. It is particularly effective for depicting the stubble on a dog's muzzle or the coarse guard hairs on the back of an animal.


Building Texture with Layering and Glazing
For longer fur or flowing manes, a layered approach is necessary to create depth without muddying the colors. You should never attempt to paint convincing fur with a single layer. Start with a clean underpainting of the base colors, establishing the major shapes and values. Once this is completely dry, you can begin the process of refinement. Use glazes—thin, transparent layers of color—to introduce warmth and depth into the shadows. As you build up these translucent layers, switch to the dry brush technique to add the final textural strokes on top, defining the edges of the hair clusters against the now textured surface beneath.
| Fur Length | Recommended Technique | Best Brush Type |
|---|---|---|
| Short | Dry Brush, Stippling | Round, Rigger, or Angular Shader |
| Medium | Layering, Combing | Flat or Bright Wash Brush |
| Long | Glazing, Lifting, Dry Brush accents | Mop Brush for washes, Round for detail |
The Critical Role of Value and Edge Control
Watercolor is fundamentally a dance of light and shadow, and fur is no exception. The illusion of volume is created by the contrast between light and dark. Observe where the light source hits the subject; the fur closest to the light will be the brightest, while the fur turning away will fall into shadow. Equally important is the management of edges. Hard edges define the foreground clumps of hair, drawing the viewer's eye, while soft and lost edges recede into the background. Resist the urge to outline every strand; instead, use a damp brush to gently lift pigment at the highlights, allowing the white of the paper to act as the natural highlight.


Blending vs. Maintaining Texture
A common pitfall for beginners is over-blending, which results in a fuzzy, grey mush rather than distinct fur. Watercolor is uniquely suited to maintaining texture because of its transparency and granulation. Instead of smoothing the paint with water, embrace the granulation. Allow the pigments to settle into the cold press texture of the paper, which naturally breaks up the color in a way that resembles hair. If you need to soften a transition, use a clean, damp brush to gently pull color from the edge, but avoid aggressively rubbing the surface, as this will destroy the paper's tooth needed for subsequent dry brush work.
Strategic Use of Color and Temperature
Color temperature is a powerful tool for separating planes and adding realism to fur. Shadows are rarely just a darker version of the base color; they are often cooler, leaning towards blue or violet, while the highlights are warmer, bathing in the light source color. For example, sunlight will add golden or yellow undertones, whereas shade might introduce cool blue or purple reflections. Additionally, avoid the temptation to use pure black for shadows. Mixing burnt sienna, ultramarine blue, or Payne's Grey creates a richer, more natural darks that allow the underlying watercolor luminosity to shine through, giving the fur a deeper, more organic quality.
Final Refinements and Practical Tips
As you near the end of your painting, focus on the "breaks" in the fur—the areas where the color changes abruptly due to the animal's anatomy. These are usually around the eyes, nose, and ears. Sharpening the edges here will anchor the subject to the page. Always work from the background to the foreground to avoid smudging wet fur with your hand. If you make a mistake, do not fight it; use it as inspiration. Watercolor rewards accidental beauty. A lifted highlight or a surprising granulation can become the very thing that sells the texture and charm of the coat, reminding the viewer that they are looking at a masterful manipulation of water and pigment, not a photograph.


Related Articles
Mastering Realistic Fur in Watercolor: A Step-by-Step Guide
Capturing the texture of realistic fur with watercolor is a rewarding challenge that blends precise observation with lyrical brushwork. The medium’s inherent...

Mastering Dog Fur with Acrylics: The Ultimate Step-by-Step Painting Guide
Capturing the texture and flow of a dog's coat in a static medium is one of the most rewarding challenges in acrylic painting. Unlike a simple solid color, fur...

Mastering Drylok: The Ultimate Step-by-Step Guide on How to Paint with Drylok
Transforming a dank basement or a crumbling cinderblock wall begins with the right materials, and Drylok stands as the first line of defense against moisture...

Master Realistic Watercolor: The Ultimate Step-by-Step Guide
To paint realistic watercolor, you must first accept that control is an illusion. The medium has its own personality, and the goal is not to dominate it, but...

How to Paint Batman Face: Ultimate Step-by-Step Guide
Transforming into the Dark Knight requires more than just a costume; it demands a precise and intimidating visage. Mastering how to paint a Batman face is the...

How to Paint a Small Engine: The Ultimate Step-by-Step Guide
Painting a small engine is far more than a cosmetic upgrade; it is a critical maintenance practice that protects your equipment from the elements and extends...